Sunday, January 11, 2009

Kaya - Coconut Egg Jam

Today i was in the mood to get my hands dirty so i was just browsing around to see what's nice to make or cook. So i decided since i dont have all the ingredients i need for egg tarts, why dont i make Kaya instead. My family sure loves kaya, especially my granny.

To make kaya, its really really easy. You'll only need 4 ingredients ;
1) sugar
2) eggs
3) thick coconut milk
4) screwpine leaves aka pandan leaves.

What i did was, in a large bowl, i broke 7 eggs and pour in bout 300gm of sugar and mix it with a mixture at a low speed instead of hand whisking it.

When i was done with the eggs mixture, i cleaned the screwpine leaves and cut it to about 8 pieces in the lenght of 3cms each. Instead of knotting the leaves i chose to cut it for its easier to handle.

Next, i poured the eggs mixture and the screwpine leaves into a non-stick pan and stir it occasionally under a low heat. Once the sugar has dissolved, remove the non-stick pan from heat and pour in bout 250ml of thick coconut milk bit by bit while stirring it. Put back the eggs and coconut milk mixture on low heat and keep stirring for another 5mins then remove from the heat and strain the mixture into a double-boiler pot.

Since i dont have a double-boiler pot, i strained the mixture into a pot and place it in a pan of boiling water. Keep stirring the mixture until it thickens.

Once the mixture is to the thickness you desire, remove from heat and let it cool off before storing it in jam bottle.

For those who loves a darker shade of kaya, you can replace white sugar with brown sugar and caramelized it. If you want your kaya to be in greenish in colour, then add some pandan leaves juice/paste/essence.

The screwpine leaves i had in the egg/sugar mixture was to give the kaya a hint of the aromatic leaves.

Saturday, January 10, 2009

Steamed Char Siew Pau

Pau's one of my granny's favourite besides Loh Mai Kai. Since granny has been hinting for quite a while now that she wants some home made pau, i finally made some pau for her today.

This is my first time tryin my hands one pau making. I was lucky to have bought the char siew today at the market. Its all bout timing. If i were late for another 5mins, my char siew would have been other's char siew for the day. I wasnt sure of how much i should buy, so i told the butcher i want 1kg of it. Since he has a lil less than a kg on his tray, i told him i'll take the amount that he has.

I used only char siew as the filling. For those who are into making everythin from scratch, you can even roast your own char siew to be used as the pau's filling. You can add some green peas and chives or scallions to the filling. 

You'll need seasoning such as water, sesame oil, oyster sauce, sugar, dark soy sauce, cornflour, peanut butter,pepper and chinese cooking wine for the filling. 

First you'll need to mix all the seasoning together on a non-stick pan and stir on a low heat until the sauce thickens before adding the finely chopped char siew and for those who wants the green peas and chives/scallions, you can also add it in when you add it in chopped char siew.

As for the dough, i bought the pau flour from Blue Key (500gm,shifted) and added some other ingredients such as instant yeast (1/2 tsp), castor sugar (100gm), water (240ml), shortening (3tbsp) and  single- action baking powder (2tbsp) since i dont have double- action baking powder at home.

First, you'll need to knead the flour mixture into a smooth and elastic dough. Once u're done, cover it with a we cloth until the dough double its bulk.

After that, shift baking powder on the dough and knead well. Cover the dough and allow to rest for 15mins or so. Divide the dough into small balls, approximately 18, depending on the size of the portion. Fill up each small dough with about a tablespoon of filling and fold it.

Before putting it on a steamer, make sure that the water is boiling. Once the water is boiling, put the rack of pau on it and steam for approximately 10-15mins.

Though the result isnt exactly what i was hoping for but i'm glad it didnt turn out to be a disaster! After steaming the pau, there's brown dots all over the pau. Not sure why not. Mom said it might be the yeast , but since i used the instant yeast , there's no need to mix it with water. Perhaps i can mix it and dissolve it in the water first before addin it to the flour mixture. The brown dots made my pau looks like its wholemeal pau! I'll definitely give it a few more try until i achieve like the ones available at the dim sum place, so white and fluffy!

Edited :

I found out why there were brownish spots on the pau skin. Its due to the lack of the very well kneading of dough after adding the baking powder! Lesson learnt, next time around, a well kneadin is needed for the brownish spots to disappear!

Friday, January 9, 2009

Tangy Mango Slaw

Like i mentioned yesterday, i'll get my hands on the pie tee mold and make some decent looking shells but i wasnt in the mood to test out my patience , so i embarked in this new recipe. 

This is actually the recipe meant to be my new filling (the modern vegetarian filling i mentioned) for the pie tee. 

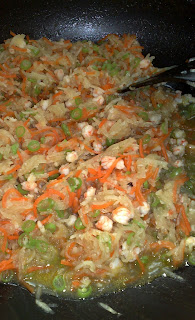
Instead of eatin it together with the pie tee shells, i decided i should jst eat it like a salad. Besides havin it as a salad, u can use it for a side dish to a pasta, chicken or even seafood dish.

Mango slaw is one really easy recipe. All you need is one shredded  firm ripe mango, shredded cucumber, shredded carrot, slices of red onions, shredded or thinly sliced red bell pepper (capsicum) and some chopped coriander leaves.

For the dressing, its a simple vinaigrette. Usually vinaigrette's a mixture of vinegar and oil with some flavoured herbs, spices and other ingredients.

Instead of vinegar, i used lemon juice with some honey, a dash or two of black pepper and a pinch of salt.

For those who loves honey, you can put more of it to tone down the tartness of lemon juice.

To get a more flavourful salad, leave it a lil longer after mixing it in the salad bowl. The shredded vegies will absorb all the tangy-ness and you'll have a less raw taste to the green vegie. This is most suitable for those who do not fancy capsicum or fresh onions.

For those who wants more stuff in it , you can put it some shredded cabbage/purple cabbage, pineapples, mandarin oranges, you name it. 

The more colourful ur platter is the better!


Top Hats - Pie Tee

Today i got the Pie Tee mold i ordered and to be honest i was eager to try it out and see if i can get the pie tee cases/shells like how some restaurants served it.

I thought it would be easy but i was so dead wrong! There are rules to follow though. For instance, ur mold cannot be to hot and it should not sizzle when its dipped in the batter. It might sound really easy but i had a tough time doin it and i wasted quite a bit of batter experimentin on how to do it and get it right.

At last i manage to get one miserable shell after a long try. Of course the test didnt just stop there, i couldnt get a proper one after that! The mold was too hot and when i dipped it in the batter, it sizzled! So again, i wasted more of the batter.

But at last i managed to get a few decent lookin shells but the bottom part of the shell isnt exactly flat. I'm still wonderin on how do they get it to look that flat.

Despite so many failed attempts, I'll be tryin to make those shells again tomorrow. I'm feelin rather dissatisfied today but hopefully tomorrow's attempt will be a successful one.

As for the pie tee fillings, i used shredded jicama (yam bean), shredded carrot, finely chopped french beans, finely chopped garlic, fresh prawns (chopped into smaller pieces), salt, sugar, oyster sauce and some chicken stock granules.

You can actually put anythin as the fillings. For those who loves mushroom, you can add it in but do slice it finely for it will fit into the shells. I've tasted some with deep-fried beancurd in it as well. So basically you can get creative with the fillings. 

Talking bout fillings, since i'm gonna try making the shells again tomorrow, i'll have a slight idea for the fillings - it will be a vegetarian filling and a modern one too!

Besides the fillings, you'll need the toppings too. Again its all bout creativity. You can have anythin as the toppings. You can even prepare a few toppings and voila a range of combinations will be formed!

As for me, since i couldnt get the scallions today and i dont quite fancy fried shallots with it, so i only had shredded omelette and a dash or two of Sri Racha hot chili sauce. 

For those who loves a lil raw green, u can add shredded cucumber on it too and perhaps a lil finely chopped onions as well.

Here are some miserable shells that i managed to make. So stay tune for a better lookin shells. Am gonna make sure this time i get it right. 

Told a friend i did this and he told me its a very hard process. Oh well, be it hard or easy, am gonna fine tune it to perfection.

Wednesday, January 7, 2009

Old Fashion Oven Chicken

You must be wondering what's this old fashion oven huh? Well, its actually my mom's or perhaps my granny's. My family members dont bake or have the interest in any oven-related stuff so there's not a need to have an oven at home.

Being somewhat curious on whether that old-fashion oven i have at home,stored somewhere in the house might be of use, i took it out and tested it by hittin the switch and wait too see if it warms up. To my surprise it warmed up and im more than glad to start making full use of it. 

Previously i bought a dozen of drumsticks and i've had half of it turned into Lemony Chicken so i thought i might as well marinate the rest overnight and cook it today. Well i'm totally clueless on wht i should be cookin with that old-fashioned oven. Why? It has no temperature control knobs on it and i have no idea how high is the celcius scale when u hit the switch and leave it on. 


So wht i did was i heated the oven for bout 10mins or so and then i lined the rack of the oven with the marinated chicken drumsticks.

Since i marinated the drumsticks im sure there will be sauce dripping from it so i placed a round flat metal place below for the drippings to be collected.

After about 15mins or so, i went to check on the drumsticks and it looks good to me, not exactly the roasted kinda look i was hoping for but it was good enough, at least the drumsticks are on its way to perfection. So i brushed a lil of the left over sauce from the marination of each of the drumsticks and closed the oven.

The next time when i went to check on it, i brushed more of the sauce on it and 10mins after that, i turned the drumsticks around and left it for another 10mins or so then went back to brushed the remainin sauce on it. 

After 10 mins, i went back to check on it and this time it looks like its done. So i dish it up and brushed it with the remainin sauce on the flat metal plate i had below the rack.

As for the marination, i had quite a bit of seasoning in it. I've had sesame oil, maggie seasoning, sweet sauce soy, light soy sauce, oyster sauce and pepper in it. These combination might be a lil salty so be careful with the measurement used.

Before i marinated the drumsticks, i used a fork to make holes on the drumsticks so that when you marinate it , it will get a fuller flavour. Its best to keep it marinated over night.

Tuesday, January 6, 2009

China Arrowheads

Arrowheads (Ngaku) also known as Chinese potato or swamp potato since it grows in the water is a seasonal vegetable  as it is only available during the CNY celebration.

Its been weeks since i've seen people flockin around the arrowheads' baskets in the market or the hypermarket. I suppose the sight of those people standin around and pickin the best ngaku from the basket got the better of me and soon i was one of them! When i was there, perhaps i was early, i was the only one standin there and takin my own sweet time pickin the best available ngaku of the bunch. 

Before this, I've tasted ngaku but i've no idea how it looks like until i did some research on it. i've tried ngaku crisps, the crisps are addictive, crunchy and tasty; once you start munching on it , its hard to stop!

I've not personally made the crisps before, so i thought why not get some back home and see wht else i can do with it besides fryin it. 

I bought a packet of it, roughly bout 600gm or so. Wanted to get more but told myself i can go back and get more if i need them. The uncleaned version of it was rather dirty, so when i got home, i cleaned off the dirt and left it aside until im ready to use it. I divided the ngaku into two portions. One for the crips and the other for stir-fryin. I heard that ngaku was originally stir-fried with pork during CNY celebration. 

The ngaku crisps are really easy to make. All you need to do is to peel the skin of the ngaku and slice it. You can either use a shredder to do so or the traditional way where u slice each and every one of it.

For me, i sliced bout 3/4 of it using a shredder and the rest i do it the traditional way for i dont have defying fingers and also i dont plan to injured my thumb again, after twice cutting myself on the same spot by a shredder!

After slicing it, i pat dry it with kitchen towel to absorb the excessive water to prevent the "fightin" session between the oil and the water. Spluttering of oil can get pretty dangerous and you might just get hit in the eye area! 

Heat oil in the wok or non-stick pan like in my case and when its hot enough, drop the sliced ngaku and when it turns brown scoop it up and drain in absorbent paper.

For those of you who like it a lil salty, you can add fine salt over chips. Shake to mix it evenly and you can store it in an air-tight container or glass bottle.

Once i was done with the crisps, i cut the rest of it into 1/8 instead of 1/4 which is rather a big chunk. I've no idea on what to stir fry it with, i didnt want it to be with soy sauce again so i thought why not add in some curry powder to it. The only available curry powder at home was the meat curry powder so i've no choice but to use that. 

For this dish, i used curry leaves, minced garlic, sliced onions, marinated minced pork (soy sauce & pepper), chicken broth, sweet soy sauce, curry powder and lastly the arrowheads.

First stir-fry the garlic then add the onions then the curry leaves, minced pork and leave it in a while and add it curry powder and continue stirring it. Add in a lil chicken broth and let it simmer for a while and add in sweet soy sauce and stir fry a lil while more and the dried curry ngaku's ready to be served.


Monday, January 5, 2009

Lemony Chicken Drumsticks

I was browsing through and i saw this recipe with Lemon Chicken as the name. It sure does sound interesting to me. Besides this, I've this friend who's  a Canadian told me that there's this chinese restaurant that he patronises served Orange Chicken and i thought to myself, why not experiement on lemon first and next i'll move on to orange? 

So today i did the lemon version. Well i wanted it to be spicy lemon chicken but it didnt quite turn out that way. Perhaps the coating powder i used wasnt as spicy as i expect, perhaps i should add in more chilli powder in it.

I marinated the chicken with rice wine, light soy sauce and egg yolk for a few hours n just before fryin, i coated the drumsticks with the spicy fryin powder i bought and set it aside for bout 5-10 mins to avoid the oil from lookin cloudy. 

As for the sauce, i used freshly squeezed lemon juice, some grated rind of lemon, chicken broth, soft brown sugar ( i used both the soft brown sugar and honey) and some cornflour to thicken the sauce. It has jst the right amount of tartness for me but it was a lil too lemony for mom n granny's like. For those who like it on the sweet side, feel free to experiment on the sugar or honey added in, also a more concentrate chicken broth is also good. My chicken broth was kinda deconcentrated so perhaps due to that the sauce is more tangy than it should be.

Next time around, am definitely gonna try a different cookin method in preparing this dish. Pan- fryin and replacing the drumsticks with strips of breast meat minus the rice wine and more chilli powder might jst give this dish more kick to it. Mayb i can try it out on my next project - Orange Chicken, for i've 6 more drumsticks left in the fridge. 

Monday, December 29, 2008

Quesadilla

Ah..finally i've got my fav quesadilla up here! My first time takin pic of it. All this while i'd prepare it for the family but never once get down to takin pics of it. Its funny how i can jst have it at any time of the day. I've had it for breakfast, brunch, lunch, tea , dinner and even a supper snack! I guess i can make do with this my whole life. Its been a while since i make this and today's quesadilla was jst so good cuz there's so much for the filling! I've prepared some black pepper and spicy mince for the fillin and also i managed to get basil last night! For the wrap, i got the traditional and the potato tortilla, wanted to get the wholemeal but i doubt my mom n bro's up for it.

These are the one with the meat filling in it. In this pic, i've prepared both the black pepper mince and the spicy mince filling for the photo takin session. Basically you can have your fav fillin in this wrap , you can even have tuna, bacon or roast chicken in it!

For the filling, i've chopped romaine lettuce, sliced tomatoes, black pepper/spicy mince and cheese! You can use parmesan or a mixture of the cheese. I used cheddar cheese for all the quesadillas i made. i jst love the combination of cheddar and tortilla. I'm also a big fan of basil so there you have it i used a lil of the chopped basil as the decorative item.

To make this its really simple, all you need is a non-stick pan, your fav tortilla wrap and fillings. Place the tortilla on the non-stick pan and heat it over a very low fire, while you're at it, arrange your fav fillings on one side of the tortilla. First i arranged the tomato slices then some chopped romaine lettuce then the stir-fried mince and covered it up with cheese. When you can see bubble formin on the tortilla then its time to cover up the side with the ingredients on. Leave for a few seconds then flip to another side and then its ready to be served. Pay attention of the fire for you dont wanna end up gettin ur tortilla burnt.

Next, its my turn to savour my version of the quesadilla. Both my mom n bro love the meat version better. They dont fancy the smell and taste of basil so i've got all the chopped basil for myself. So wht i've got in the wrap are : slices of tomatoes, romaine lettuce, chopped basil and cheese. If you like , u can put a lil butter or marjerin before placin the tortilla on the non-stick pan. For those who loves garlic, you can also get the garlic tortilla to go with any of your fav fillings.

 
Technorati Profile